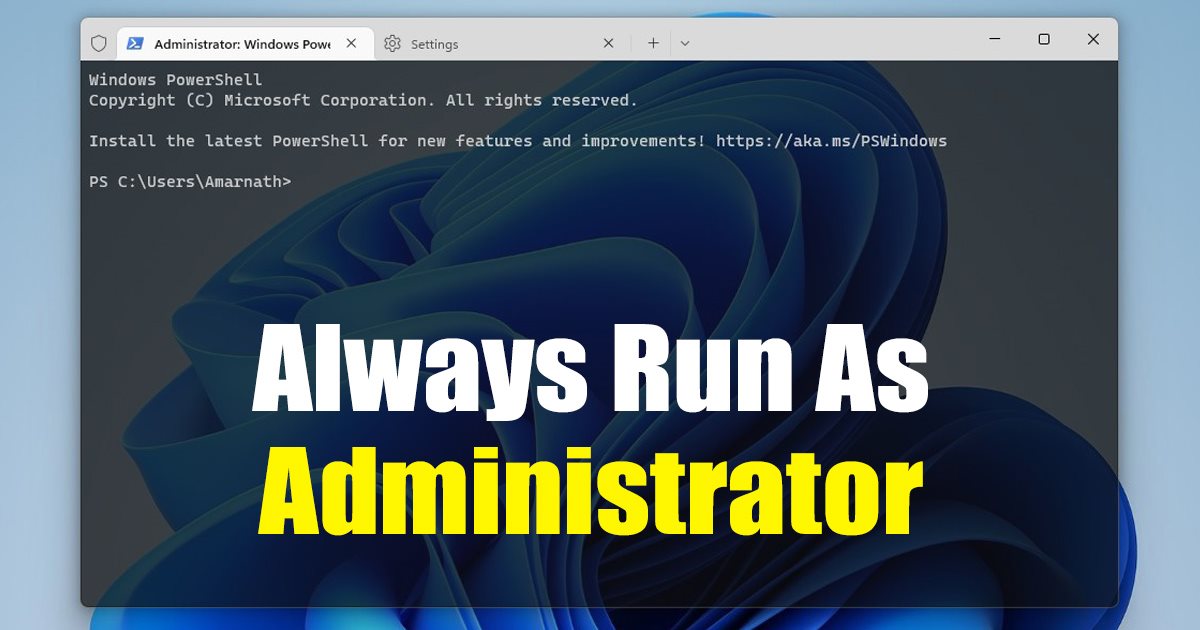
Even though the new tool is helpful as it lets you access all pro tools from a single place, it always runs in user mode by default. While making changes to system settings or protected folders, you may sometimes have to run command line tools as an Administrator. Fortunately, the Windows Terminal app can be configured in Windows 11 to always run in administrator mode. If you set Windows Terminal to always run as administrator, you don’t need to run all command line tools as an administrator manually. Also read: How to Change Color Scheme and Font in Windows Terminal
Steps to Always Run Windows Terminal as Administrator
There are multiple ways to force Windows Terminal app to always run as an administrator; you can either change the Terminal settings or create a shortcut. Here are the two best ways to always run Windows Terminal as an administrator on Windows 11.
Always Open Terminal as an Administrator
Here we will make a few changes to the Windows Terminal’s Settings to always run it as an administrator. Follow some of the simple steps we have shared below.
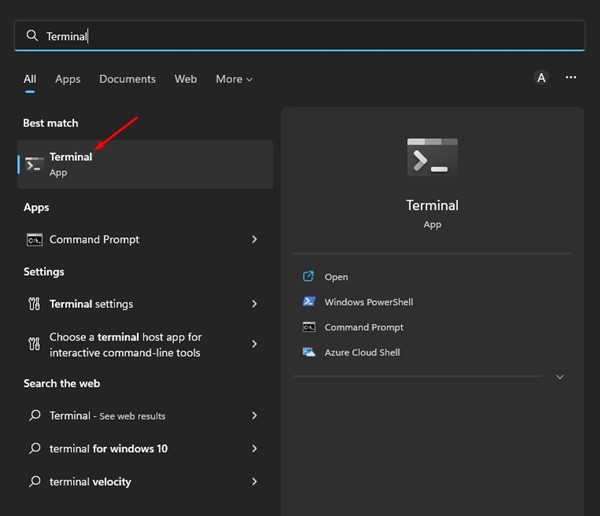
First, click on the Windows 11 search and type in Terminal. Next, open the Windows Terminal app from the list.
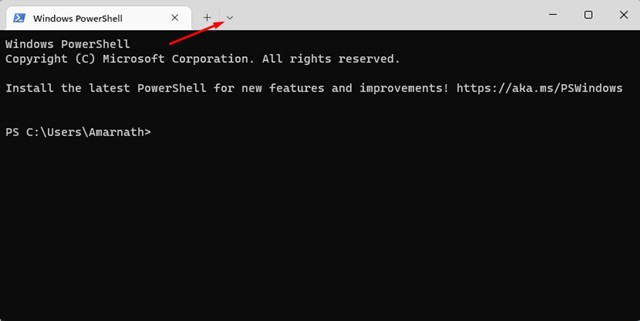
When the Windows Terminal opens, click on the drop-down menu in the tab as shown below.
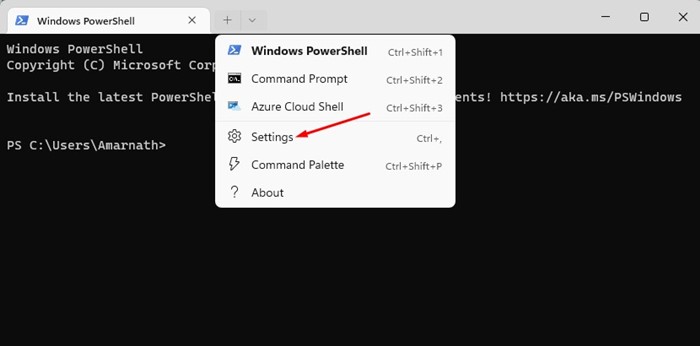
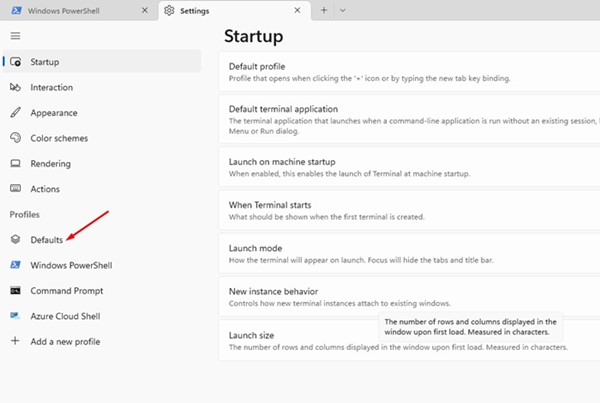
On the menu that appears, click on Settings.
On the Settings, click on the Defaults on the Profiles section.
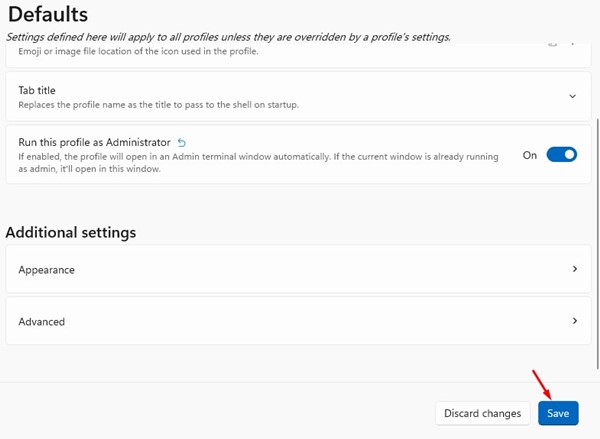
On the right side, scroll down and enable the toggle for ‘Run this profile as administrator’
After making the changes, click on the Save button.
That’s it! This will force Windows Terminal to always run profiles such as Command Prompt, PowerShell, etc., as an administrator.
Create a Desktop Shortcut to Open Windows Terminal as an admin
Well, if you are using older builds of Windows 11, you won’t find the ‘Run this profile as administrator’ option. Hence, you need to create a desktop shortcut for the same purpose.
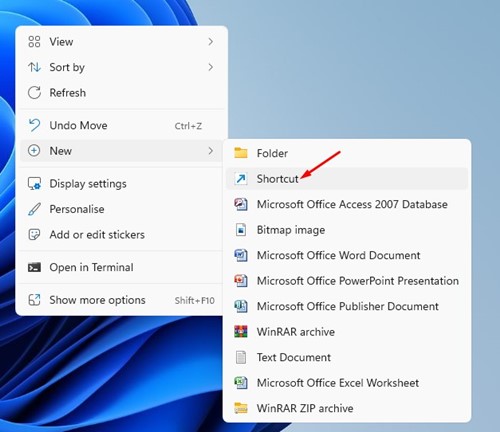
First of all, click on anywhere on your desktop and select New > Shortcut.
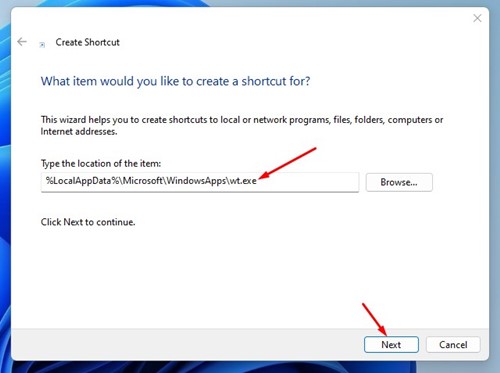
On the type the location of the item field, type the following path and click on the Next button. %LocalAppData%\Microsoft\WindowsApps\wt.exe
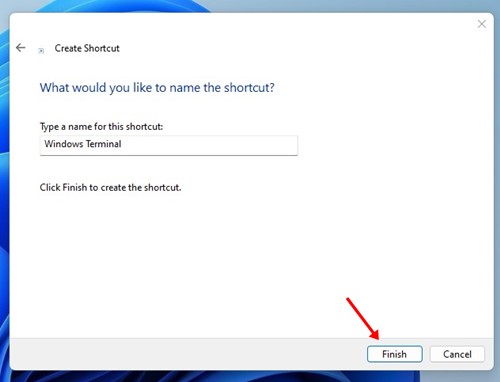
Now, on the Type a name for this shortcut field, type Windows Terminal and click on the Finish button.
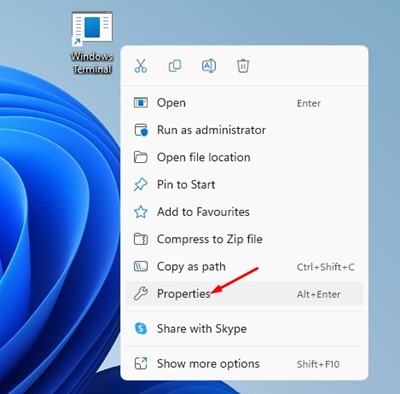
Now, right-click on the newly created Windows Terminal shortcut and select Properties.
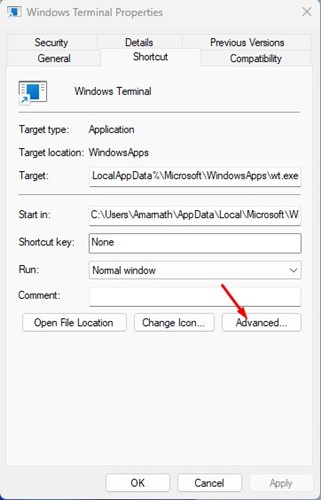
On the Windows Terminal properties, click on the Advanced.
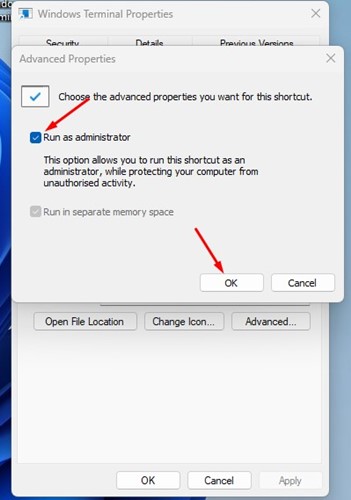
On the Advanced Properties, check the Run as administrator option and click on the Ok button.
That’s it! This is how you can create a desktop shortcut for Windows Terminal to always run as an administrator. Also read: Download Windows Terminal Latest Version While we have shared the methods for Windows 11, Windows 10 users must follow the same steps always to run Windows Terminal as an administrator. So, that’s all about how to always run Windows terminal as administrator on Windows 11. If you need more help, let us know in the comments below.
Δ