According to Microsoft, if you have an unreliable internet connection or updating multiple devices from the same internet, allowing downloads from other PCs will significantly speed up the download process. When the Delivery optimization is turned on, your PC will send parts of your previously downloaded Windows updates to another PC on your local network. While this is a helpful feature, it’s best to disable the Delivery Optimization if your internet speed is fast and you don’t have another PC on your network. You can also delete the Delivery optimization files to save some disk space. Manually deleting the Delivery Optimization files on Windows 11 is not recommended because it can invite trouble, but you can delete them from the Disk Cleanup tool. The Disk Cleanup tool will only delete the unnecessary Delivery Optimization files and free up disk space. Also read: How to Turn Off Delivery Optimization on Windows 11
Delete Delivery Optimization Files in Windows 11
Hence, if you are looking for ways to free up storage space on your Windows 11 PC, you can try deleting the Delivery Optimization files. Here’s a step-by-step guide on how to delete delivery optimization files in Windows 11. Let’s get started.
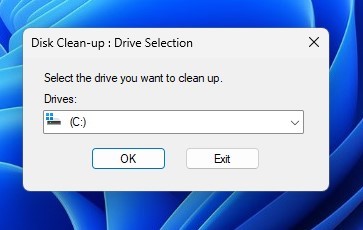
Click on the Windows 11 Search and type Disk Cleanup. Next, open the Disk Cleanup utility from the list of options.
Select your system installation drive and click on the Ok button on the Disk Cleanup utility.
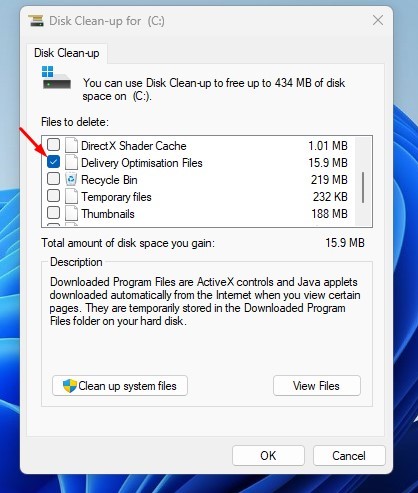
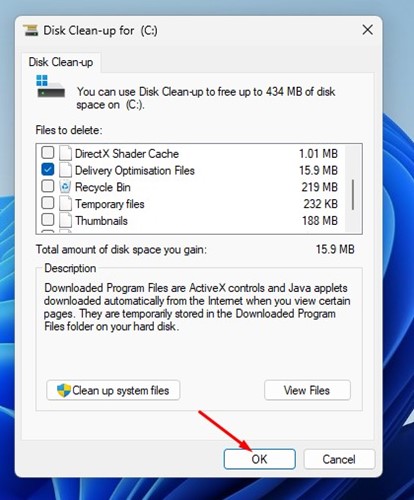
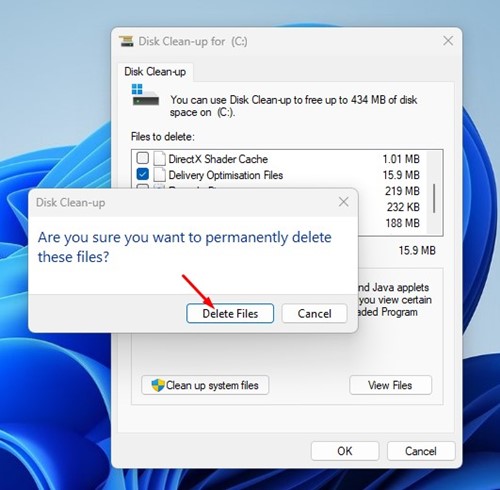
On the Disk Cleanup utility, check the Delivery optimization files and uncheck all other options.
Once done, click on the Ok button.
Now, you will see a confirmation prompt. Here you need to click on the Delete Files.
That’s it! This will delete the Delivery Optimization files on your Windows 11 computer. Please note that the Disk Cleanup utility will only clean the Delivery Optimization cache files.
How to Turn Off Delivery Optimization on Windows 11
Here’s how to disable Delivery Optimization on Windows 11. After deleting the Delivery Optimization files, you can turn off the feature entirely. This way, you can save internet bandwidth and disk space.
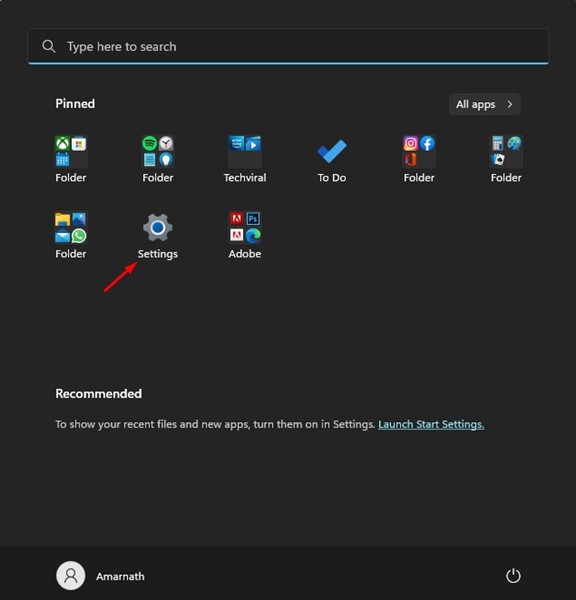
First, click on the Windows 11 Start button and select Settings.
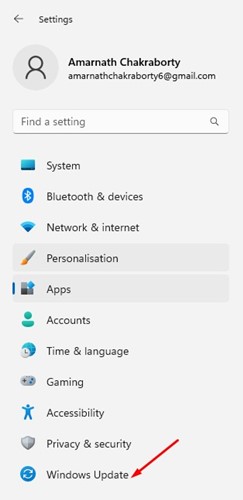
Next, click the Windows Update button on the left sidebar.
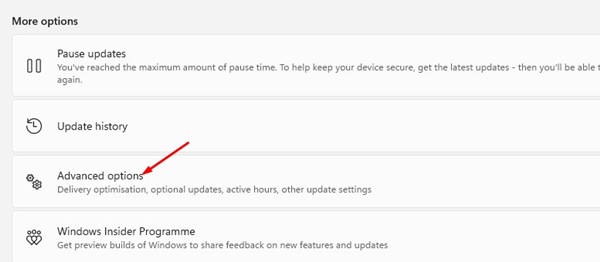
Next, on the right pane, scroll down and click on Advanced Options.
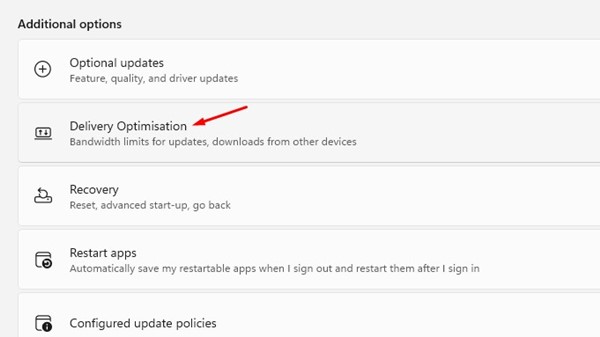
On the Advanced options, click on Delivery Optimisation.
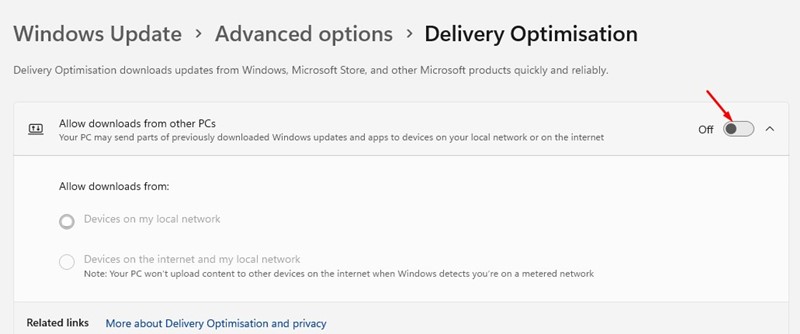
Now, on the Delivery Optimisation screen, turn off the toggle for Allow downloads from other PCs.
That’s it! This will disable the Delivery optimization on your Windows 11 computer. So, these are some of the simple steps to delete Delivery optimization files in Windows 11. You can try clearing the Delivery Optimization cache file if your PC runs low on storage space. If you need more help with Delivery Optimization, let us know in the comments below.
Δ