Tech companies collect data through their telemetry system to improve the user experience while using their apps and services. Similarly, Microsoft also collects your data through its telemetry system on Windows 11 to enhance your user experience. Microsoft collects your activity information, such as the apps you use, your system settings, Windows settings, sites you visit, etc., and sends it to its Server. Microsoft needs the data from its users to improve the operating system, enhance security, and resolve existing bugs. While Microsoft has fair reasons to collect data remotely, it could be a privacy concern for many. Not everyone would want to give away their system & app usage details to Microsoft without consent. If you don’t want Windows 11 to collect & send telemetry data to Microsoft, you need to disable it manually. Also Read: How to Update Drivers on Windows 11
Steps to Disable Telemetry on Windows 11
It’s pretty easy to disable Telemetry on Windows 11, and you can do it without installing any third-party app. Below, we have shared a few best ways to limit data collection on Windows 11. Let’s get started.
1) Disable Sending Diagnostic Data on Windows 11
To get started, you first need to turn off sending optional diagnostic data to Microsoft in Windows 11. Here’s what you need to do.
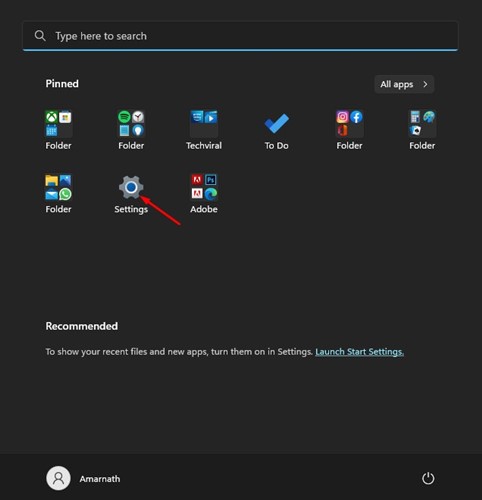
First, click on the Windows 11 Start button and select Settings.
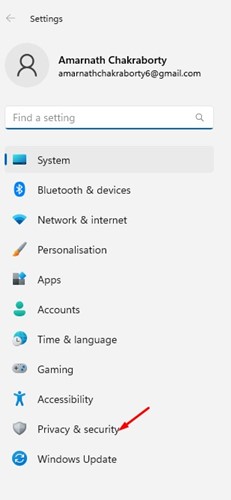
On the Settings app, click on the Privacy & Security section on the left pane.
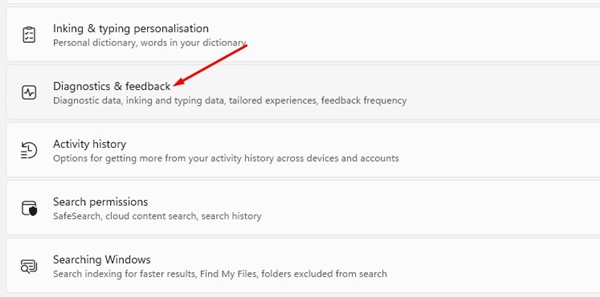
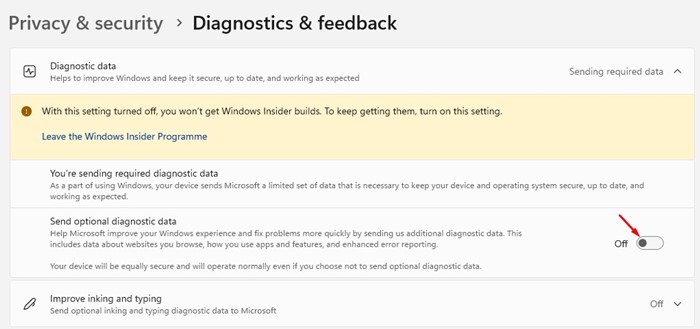
On the right, scroll down and click the Diagnostics & feedback option.
Next, expand the Diagnostic data section and turn off the toggle for ‘Send optional diagnostic data’
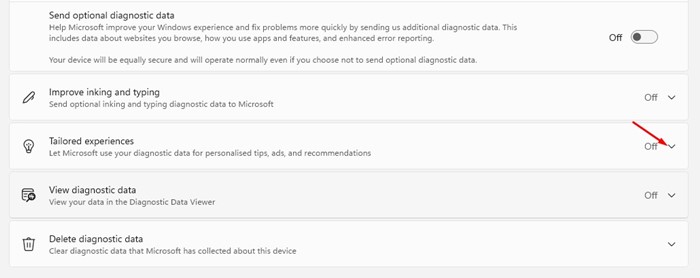
Now scroll down a bit and expand the Tailored experiences.
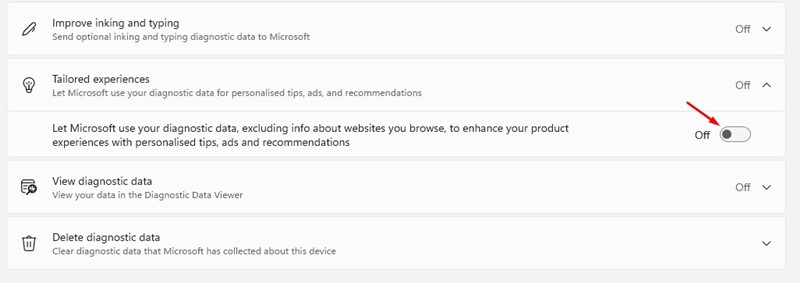
Under the Tailored Experiences, turn off the toggle switch that reads ‘Let Microsoft use your diagnostic…’
That’s it! This will prevent Windows 11 from sending telemetry and other diagnostic data to Microsoft.
2) Disable Other Diagnostic Data on Windows 11
You need to disable a few other options to prevent data tracking entirely. Here are the few things you need to disable.
First, click on the Windows 11 Start button and select Settings.
On the Settings app, click on the Privacy & Security option in the left sidebar.
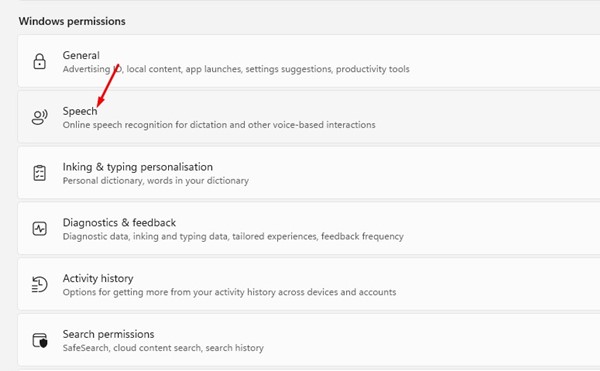
On the right pane, click on the Speech.
Turn off the toggle for Online Speech recognition on the next page.
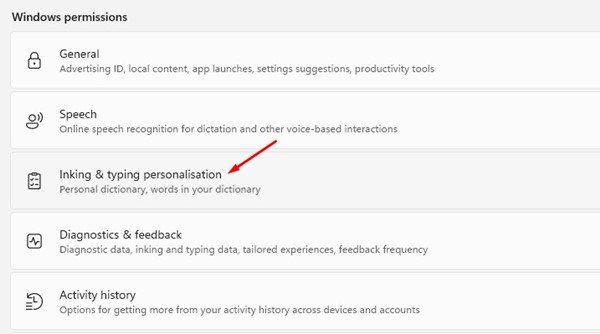
Now, move back to the previous page and, click on the Inking & typing personalization.
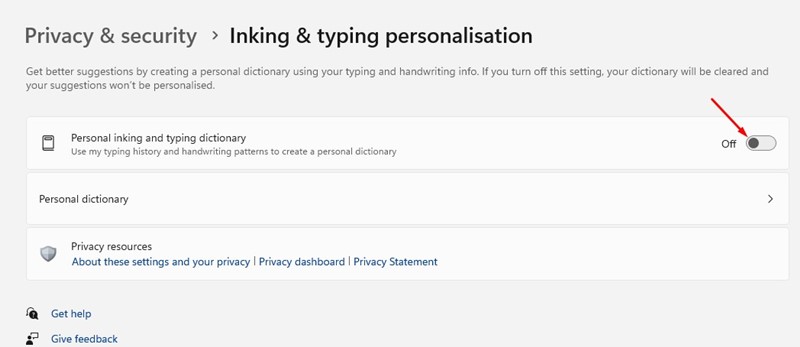
On the next screen, turn off the toggle for ‘Personal inking and typing dictionary’
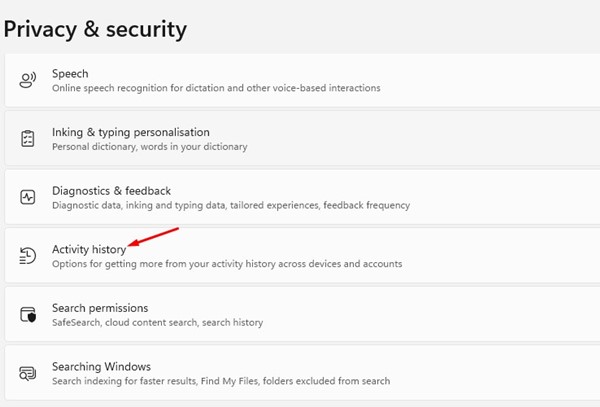
Now, move back to the previous screen and click on the Activity History.
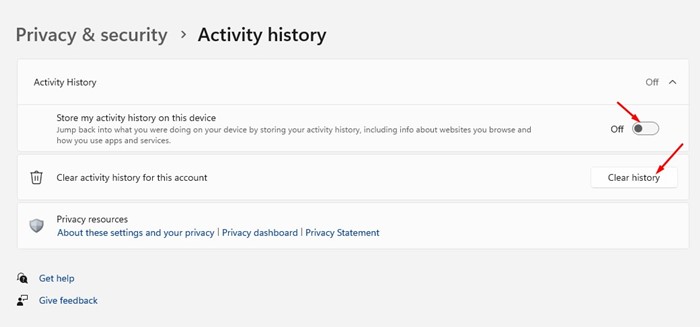
On the Activity History section, turn off the toggle for ‘Store my activity history on this device’. Once done, click on the Clear History button.
3) Make Changes to General Privacy Settings
You can also make a few changes to the Genera Privacy Settings of Windows 11 to prevent data tracking. Here are some of the important changes you need to make.
First, click on the Windows 11 Start button and select Settings.
On the Settings page, click on the Privacy & Security option in the left pane.
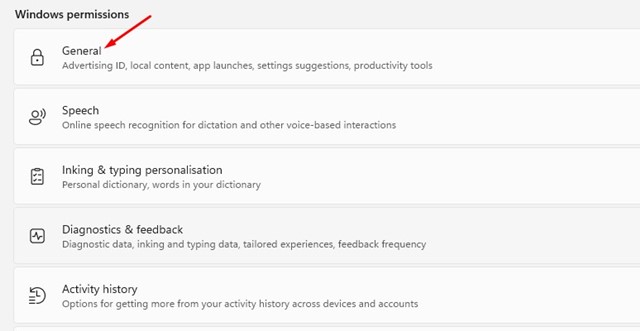
On the right, scroll down and click on the General option under Windows permissions.
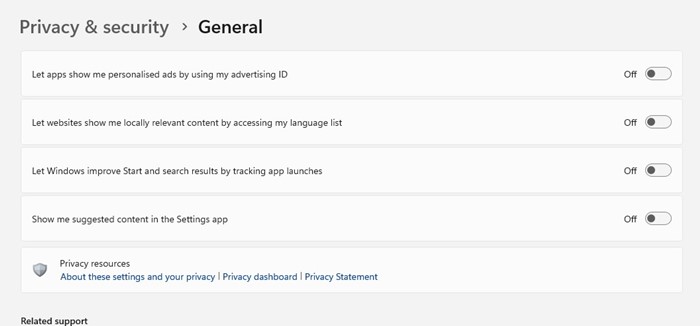
On the next screen, you need to disable all four options:
Let apps show me personalized ads by using my advertising ID. Let websites show me locally relevant content by accessing my language list. Show me suggested content in the Settings app. Let Windows improve Start and search results by tracking app launches. After disabling all four options, restart your Windows 11 computer.
Also read: How to Change Wallpaper in Windows 11 Without Activation So, these are the best ways to disable telemetry on Windows 11 pc. The methods would disable all types of data tracking on your device. If you need more help regarding Telemetry data, let us know in the comments.
Δ
