How to Print to a Windows Connected Printer from MAC
Firstly make sure that both the Windows running computer and Mac should be on the same home network. And now simply follow the below steps to proceed.
Steps To Print to a Windows Connected Printer from MAC:
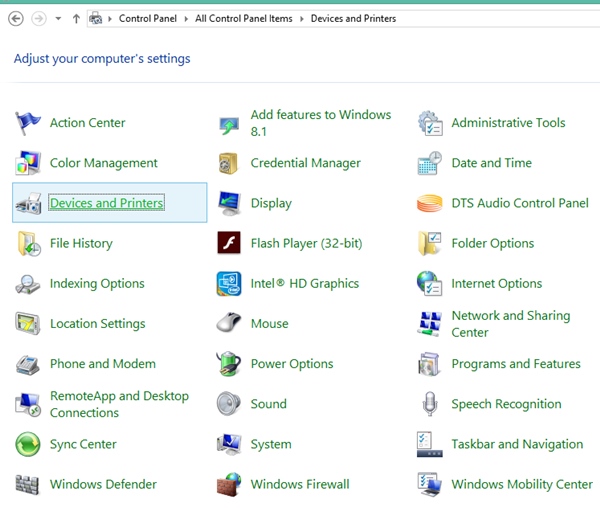
- Open up the Devices and Printers panel on your Windows computer, you can open it through the Control Panel. After that you will see a list of devices and printers on the screen that are attached to your PC.
- Find out the icon for the printer that is attached to the computer and then Right-Click on that icon. Select up the properties option from the list of options that appears.
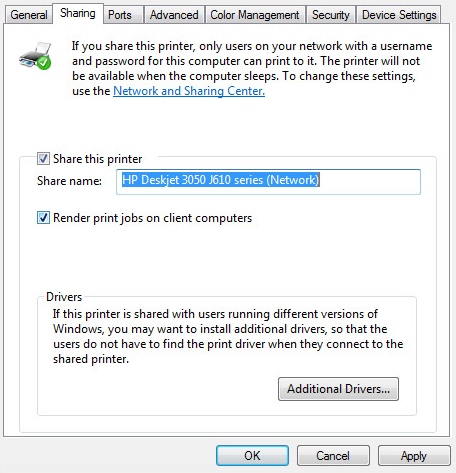
- On the Printer Properties window that you will see after completing the first step, switch to the sharing tab and then click on the option “Share this Printer” to check it.
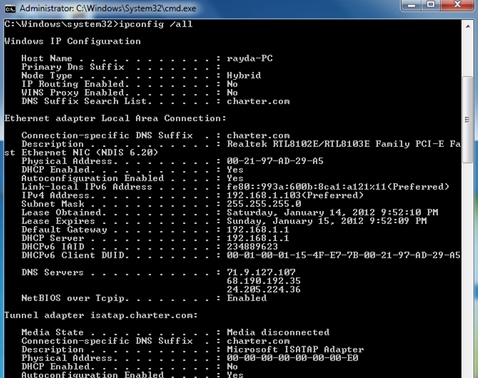
- Open up the command prompt after that and then type up the command that is given below: cmd:”ipconfig/all” Check up your computer’s Host name from the Command windows after that as it will appear on your screen.
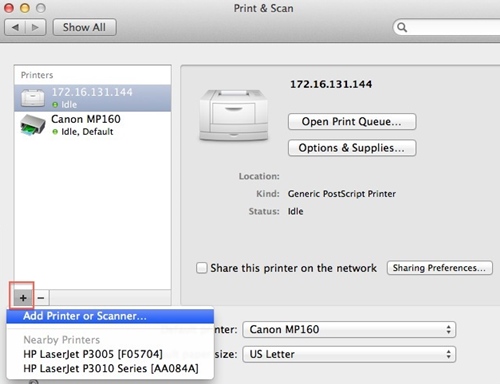
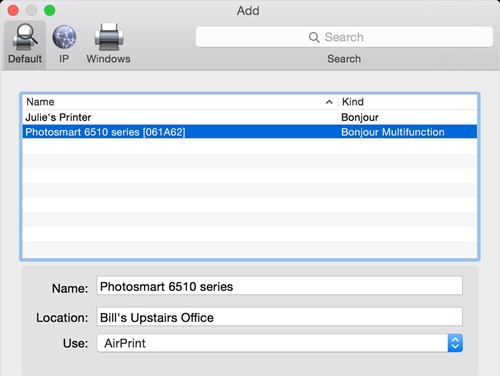
- Now, on your Mac system you has to go to the Preferences and then open up the Printers and Scanners menu. You will have to now add up the new printer to your Mac and you can do that by clicking up the ‘+‘ button from the screen of Preferences and Scanners menu. 6. After clicking the ‘+‘ button, just switch to the Windows tab from there and choose up your workgroup. This will be same as your Windows PC host name, just select that workgroup.
- Now go to the “Use” menu that you can see on your screen and then from there select up “Select Software” option and then choose up the Printer that is been connected to your Windows. 8. And at the end you will have to just click on the Add button from the Panel options so as to start accessing your Printer directly from your Mac. Just select up the Windows connected printer every time you will print anything from your Mac and you will get your command passed to that Printer. Note: One thing that you have to keep in mind is that the Printer Sharing should be enabled on your Mac. If not enabled then you can enable it by going to the “System Preferences -> Sharing“. So the above discussion is all about how you can easily print out your documents, projects, pictures etc directly through your Mac, no matter if the printer is connected with the other PC running on Windows OS. The method is really very simple to follow and you can also easily print up the things quiet easily using this method. Now you won,t even need to use up different printers for different computer devices running on Mac or Windows.
Δ