Recently, many users have reported Taskbar problems in Windows 11. Several users have reported that the taskbar has stopped responding, while others have reported missing icons. So, if you are also experiencing taskbar-related problems on your Windows 11, you are reading the right guide.
3 Best Methods to Reset Taskbar Settings in Windows 11
In this article, we will share a step-by-step guide on how to reset Taskbar Settings on Windows 11. A simple reset can fix most of the taskbar-related problems on your Windows 11. So, let’s check out how to reset Taskbar settings in Windows 11.
1) Restart Taskbar via the Task Manager
If the taskbar has stopped responding, you need to restart the Windows Explorer process. When you restart the Windows explorer, it also resets the Windows Taskbar. Here’s how you can restart the taskbar from the Task Manager on Windows 11.
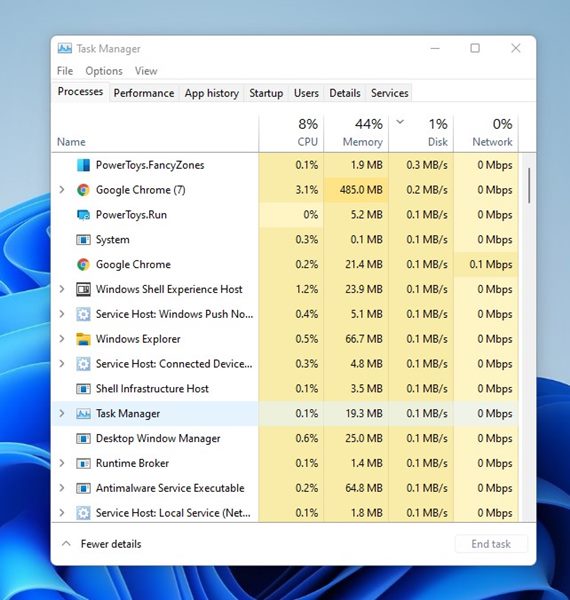
First of all, press the CTRL + SHIFT + ESC key on your keyboard to open the Task Manager.
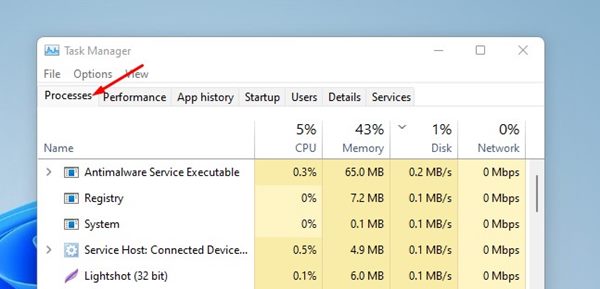
On the Task Manager, switch to the Processes tab, as shown in the screenshot below.
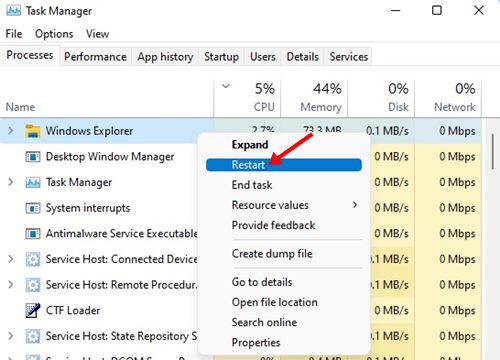
Now, on the list of processes, find Windows Explorer. Right-click on Windows Explorer and select the Restart option.
That’s it! You are done. This is how you can restart Windows Explorer to fix Taskbar not responding on Windows 11. There are also other methods to restart Windows Explorer; you can check out all methods in –
2) Restart Taskbar using Command Prompt
In this method, we will use the Command Prompt utility to restart the Taskbar. You can also implement the same methods on PowerShell as well. Here’s what you need to do.
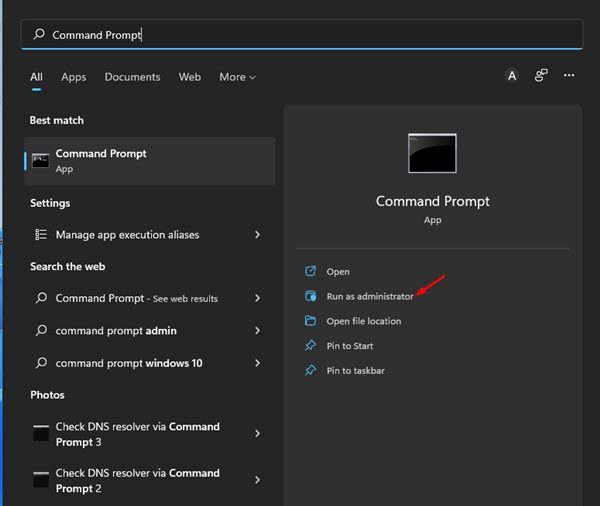
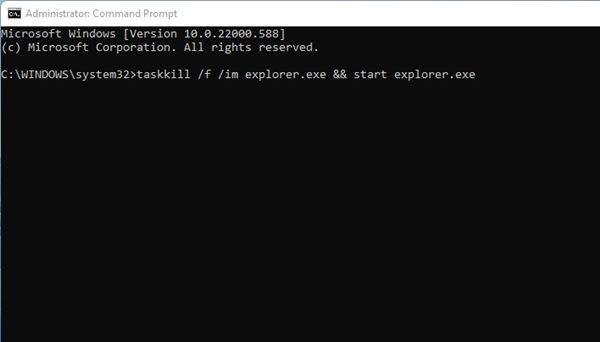
First of all, open the Windows 11 search and type in Command Prompt or PowerShell. Right-click on CMD or PowerShell and select Run as Administrator.
On the Command Prompt or PowerShell, execute the command: taskkill /f /im explorer.exe && start explorer.exe
That’s it! You are done. This will force restart the Windows Explorer on your Windows 11. This will also reset the Taskbar.
3) How To Add Missing Icons on Windows 11 Taskbar
If you don’t see your most used icons on the Windows 11 taskbar, you need to configure the taskbar settings to display the icons manually. Here’s how to add missing icons on Windows 11 taskbar.
First of all, click on the Windows 11 Start button and select Settings.
On the Settings page, select the Personalization tab.
On the right, scroll down and click on the Taskbar.
Now, expand the Taskbar items section and enable the buttons you want to add to the taskbar.
That’s it! You are done. This is how you can add missing icons on Windows 11 taskbar. Although there’s no direct option to reset Windows 11 taskbar, restarting the Windows Explorer usually fixes the problem. I hope this article helped you! Please share it with your friends also. If you have any doubts related to this, let us know in the comment box below.
Δ

![]()
![]()
![]()
![]()