How To Remotely Control Any Windows PC With CloudBerry Remote Assistant
It is not the first time that we are talking about the subject, of course, I am talking about “manage computers remotely”. As the tech giant Microsoft’s Windows 10 brings a remote access tool in its most complete versions. And not only that even nowadays we have many remote access applications available to manage our PC remotely from any Android devices as well. But, today we are going to focus on a very efficient tool, which is known as CloudBerry Remote Assistant, a free tool which is available for Windows that allows to share a desktop and perform remote control quickly and safely. Also Read: How To Install Custom Themes In Google Chrome However, the fact is that, among all its several applications and tools available for all the major platforms like Windows, Mac, and Linux, now it has launched a remote access tool, known as CloudBerry Remote Assistant, as we hinted earlier.
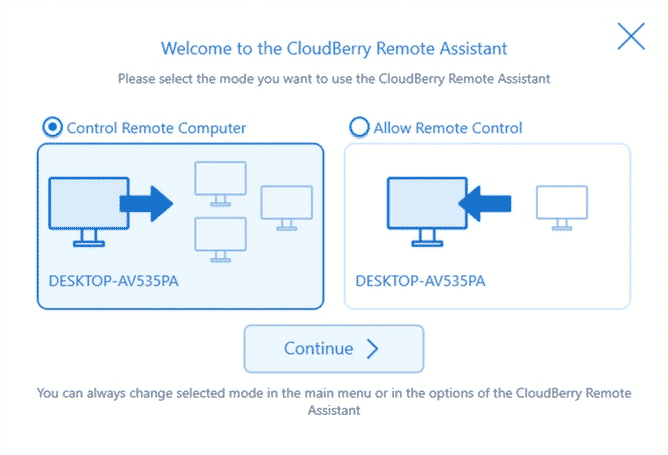
But, the fact is that for now, it is available for the tech giant Microsoft’s most used computer operating system, of course, Windows. However, it is a free application for both personal use and professional environments, and in this sense, it will be very useful and economical if we manage several computers in an office. Moreover, the CloudBerry Remote Assistant allows another computer to access our PC or view our desktop securely (using 256-bit AES encryption). While on the other hand, we can access another PC to perform any action, such as changing the configuration, updating something, installing a program, whatever we want. As a bonus feature, since it shortens distances, the CloudBerry Remote Assistant also has voice and text chat feature, so that while we carry out maintenance or repair tasks, we can talk with the other person and solve the problem first. As we said before, the CloudBerry Remote Assistant is completely free and you just have to download it from its official website to start using it. Of course, we will be asked for an email address, and after the download starts, we will get a numeric code on the web page that we have to open to activate the application. The installation does not need any explanation; to do so, we must follow the instructions. After opening the CloudBerry Remote Assistant we will get two options to choose: “Control Remote Computer” and “Allow Remote Control”, as you can see in the image below.
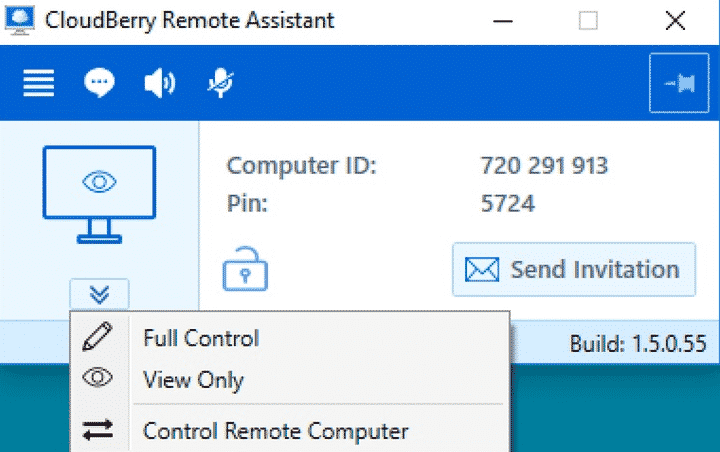
Now after getting these options we have to choose one, however, the fact is that from the main window of the application we can change between both options at any time. For example, if we have activated the client mode, then it is necessary to put the ID of the other PC. And not only that even the system will also ask for the PIN code. That ID and that PIN are provided by the tool itself, of course, CloudBerry Remote Assistant when we activate the “Allow Remote Control” option. To facilitate these codes we can do it via an email invitation from the application itself. In addition, there are two control modes: Full Control or View Only. The complete control will be useful for someone to manage our system or solve any technical error.
The second, View Only can be used to teach any presentation or show someone how to solve a problem by their own or how to perform a certain task in real time that’s it. Basically, the CloudBerry Remote Assistant shows the desktop of the other PC with a lower resolution. However, there is usually a delay of few seconds between the order we give and what happens in the other system, but, the fact is that the better our internet connection will be, the better quality we will get. Also Read: Top 15 Best Free Graphic Editors for Creating Vector Image So, what do you think about this? Simply share all your views and thoughts in the comment section below. And if you liked this tutorial, do not forget to share this article with your friends and family.
Δ


